§ How-To
How to Replace a Chainsaw Sprocket or Clutch Drum
A worn sprocket quietly destroys new chains. Here's how to spot wear, tell spur from rim, and make the swap.
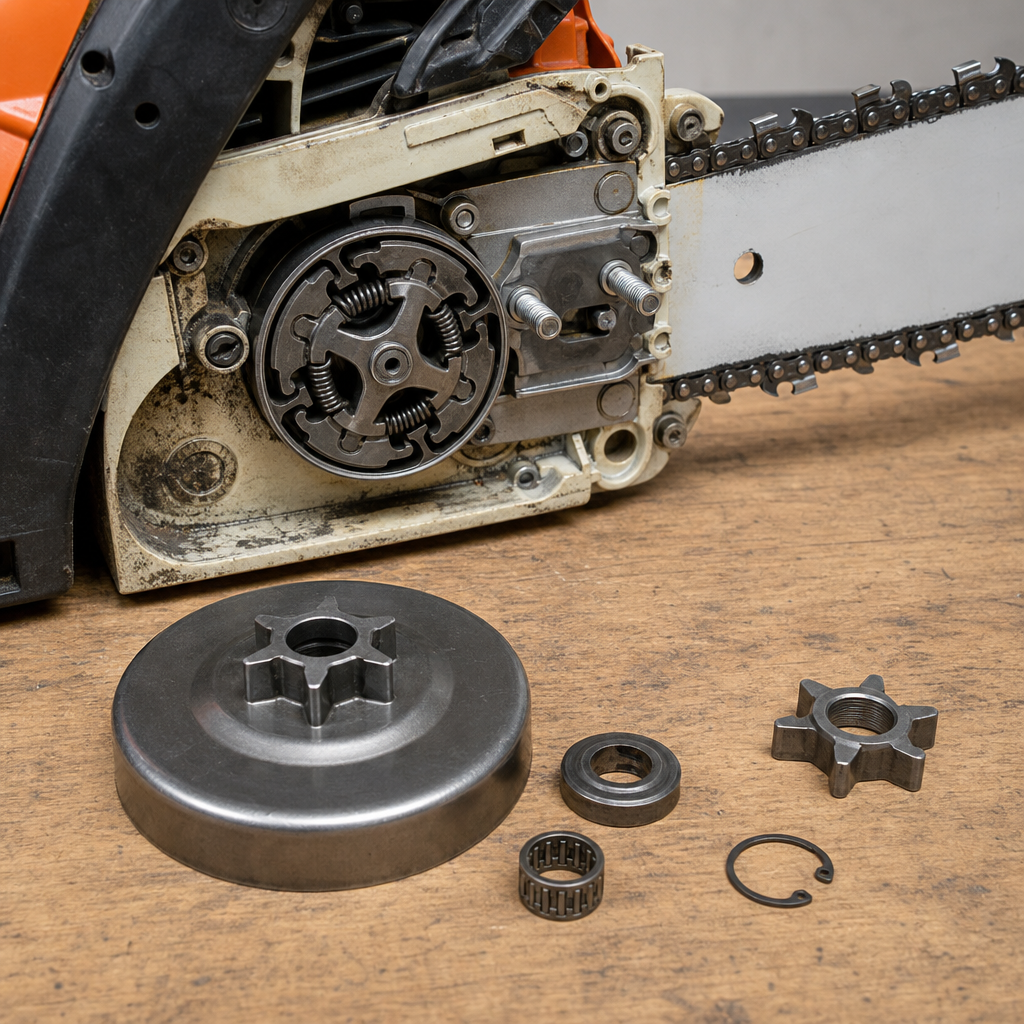
The drive sprocket is the part that turns engine power into chain movement, and it wears with every chain you run. Most people never think about it — until a brand-new chain starts stretching fast, jumping, or wearing unevenly. The rule of thumb: replace (or inspect) the sprocket every two chains. A new chain on a worn sprocket is false economy.
How to tell it’s worn
Pull the side cover and look at the sprocket teeth where the chain’s drive links ride:
- Light wear: clean, rounded valleys between teeth — fine to keep running.
- Replace it: visible grooves or hooks worn into the teeth deeper than about 0.5 mm (0.020”). If you can feel a sharp step with a fingernail, it’s done.
A worn sprocket no longer spaces the chain correctly, which is why it chews up new loops.
Spur vs. rim — know which you have
There are two designs:
- Spur sprocket: a single one-piece sprocket pressed/splined onto the clutch drum. When it wears, you replace the whole drum-and-sprocket unit (or the sprocket if it’s separately serviceable).
- Rim sprocket: a splined drum with a replaceable rim that slides on. Only the cheap rim wears out — you keep the drum. Rim systems are cheaper to maintain and are common on mid and pro saws.
Match the pitch of the new sprocket/rim to your chain (3/8” LP, .325”, 3/8”, etc.). A sprocket of the wrong pitch will not space your chain correctly even if it physically fits.
The swap (typical saw)
- Battery out / spark plug boot off.
- Remove the side cover, bar, and chain.
- Remove the clutch cover components. On many saws the drum lifts off a needle bearing on the crankshaft once an E-clip and washer are removed; on others the clutch itself must be unthreaded (often left-hand thread) to access the drum.
- Inspect the needle bearing behind the drum — clean it and add a dab of high-temp grease, or replace it if it’s blue/worn.
- Fit the new rim or drum, reassemble in reverse, and install a fresh chain (don’t pair a new chain with whatever you just removed if it’s stretched).
- Set chain tension and oil — see How to Install a New Chainsaw Chain.
Don’t overlook the clutch and bearing
While you’re in there, spin the drum — it should turn smoothly on the bearing. Roughness means a worn needle bearing, which is cheap to replace now and expensive to ignore. Browse sprockets, clutch drums and rims, and confirm pitch against your chain before ordering.